Have you ever wanted a way to make your laptop better, such as improving the storage without tons of usb drives just laying about? Maybe even to upgrade your laptop’s RAM to be able to have more web browser tabs or even to run games a bit better? Well, with a little bit of confidence and money, you can upgrade your laptop for cheap, rather than needing pesky external storage drives or to buy a new computer.
This tutorial will focus on upgrading storage rather than the RAM, but RAM can still be added onto this tutorial.
Materials and other stuff that you will need before the SSD upgrade
● To start off, make sure you know what model laptop you have, as researching is key for upgrading (some laptops might have limitations to upgradeability, or require a little expertise in the form of researching internals.) You will also need some supplies, mainly a screwdriver, preferably with tips that match the screws under your laptop (most laptop manufactures use philip screws, so a screwdriver with a phillip head will most likely get the job done.)
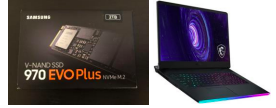
● You will also need to buy an internal drive, which can usually be found in the form of SSD (solid state drives) as newer laptops use these, but if you have an older laptop, such as from 2010 or prior then you might need to find an HDD (hard disk drive) instead. This is where money is mainly needed for the build, with most drives costing $50 to even $200+
● You will also need time and patience, and maybe another pair of helping hands to make your upgrade easier.
● A clean working area will prove beneficial to upgrading. (lost screws are going to drive you to insanity.)
● A paper clip to cut power from the battery (will be explained in a later step).
● A pair of rubber gloves to protect from the internal components.
Warning: Upgrading your laptop may void your warranty. Some manufacturers have a sticker placed on a screw, that if damaged will make your laptop not eligible for a warranty.
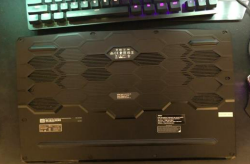
Step 3: This is where the fun starts, begin with wearing a pair of rubber gloves and then getting a hold of your screwdriver. Look for the screws on your laptop and begin to screw them completely off. No screws should be left on the casing, and should be organized according to where they were opened. (Sometimes manufacturers make some screws longer or shorter than others to accomodate for spacing)
Step 4: Disconnect the battery from the laptop, this can be found by a wire connected to the big blax rectangle onto the board, disconnecting it will ensure extra safety. Once you have opened up your laptop, look for thin, rectangle-shaped cutout tabs, this is usually where the SSD is placed. One of these rectangles is already filled with the SSD given from the manufacturer while the other is empty, giving us room to upgrade. Extra: The thicker rectangles are where the RAM is located, so if you want to upgrade your RAM, you can install them there.
Step 5: Place the SSD into the socket on the opposing side with the screw then push down on the SSD while screwing the SSD down to the board. You can then put back the tab onto the newly added drive and put the case back on as well as screwing the screws back into place. Do not screw in too tightly as to prevent stripping the screw, which comes from over tightness.
Step 6: Turn over the laptop and turn it on, and if it boots up, you have successfully upgraded your laptop; Congrats! There is still one more step to go to ensure you have access to your new drive.
Step 7: The last step is to format your new drive for Windows to read. Right click on the Windows button and look for Disk Management. It will then read your disk and ask you for initialization, as either MBR, or GPT. Only do GPT if your new drive is greater than 2 TB of storage. If equal to or less than 2 tb do MBR. Once you press OK it will begin to initialize. After pressing ok, a new drive will be found, which can be seen with a black bar above it and it will say “Unallocated” in the Disk Management software. Right click it and press “new simple volume” and go through the “New Simple Volume Wizard”, usually everything will be fine by default so continue to press next. Once finished, File explorer will open and ask you if you want a Format Disk, in which you accept.
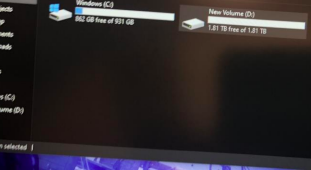
You will then see a new drive added into your laptop.If you did not understand this step. Do not worry, this video shows how it's done. https://www.youtube.com/watch?v=ZxV6IcNvbek
Now you are finally done and able to download even more stuff onto your laptop. Enjoy having more storage, and if you want to, try adding some RAM to allow for more chrome tabs, or even to run some games, if you’re up for it.
Upgrading your Laptop’s storage is a simple and more cost effective way than buying an entirely new one for the sole purpose of more storage, and is a good introduction into modding your laptop. More experience in this hobby can lead you yearning for more performance out of your laptop, whether it be for creative applications or for gaming, you can do more modding, such as changing thermal paste, changing voltages through bios, and even cleaning buildup of dust and debris, as access into the insides of a laptop allow you to clean your laptop much better and easier than a simple can of compressed air from the outside. I’ve always had a knack for technology, so when I first began, I had only software tech smarts, but now I’ve grown to learn hardware tech tips to share with you all.


This is a really good tutorial! It's evident that you're really knowledgeable with computers, and providing pictures helps the reader to understand the process behind the tutorial. However, I think it could've benefitted you to explain what some of the terms mean - such as a "drive" or an "SSD". Otherwise, it's particularly well written and I think works in the context of your intentions! - Ethan
ReplyDeleteHi Sameer! This is a really detailed and greatly in-depth tutorial! As someone who knows very little about computers, I love pieces like these because it makes me understand something I use every day. I loved the pictures and step by step explanations. Great job! - Alec H.
ReplyDelete